Hi,
I have know for a long time that I have a serious obsession with fonts. They make me happy.
So, I was super excited this morning to discover iFontMaker for the iPad (available in iTunes). With this program you are able to create your own font using the touch screen of the iPad. So cool!
The program gives you guidelines to show you where the letter will be, as well as a sample letter.
You use your finger to show where you want the lines of the letters to be. Sorry, you will have to use your imagination for the finger :)
After you have completed all of the letters you create the font. You can visit this website and download your font (or others) to your computer. Once the fonts are on your computer, you can use them like any other ttf font.
The website also offers helpful tips on how to use the iFontMaker program.
You can go here to download my font.
I hope that you enjoy this program. Make it your own!
~Kate
Hip Gig Stretch
Sunday, April 22, 2012
Friday, April 20, 2012
Celebrate Daily
Hi!
Today I was on Pinterest and was very intrigued with this post from Take 2, They're Small about being organized. Being organized is always on my list of things to work on, so I am constantly on the look out for new good tips.
Since I started perusing the blog looking for tips on ways to improve an area of my life, I was pleasantly surprised when I came across a link to this post by Design for Mankind about non-goals for 2012.
I love this idea! I think that it becomes too easy to focus on areas where we need to improve and forget that we as individuals do good (or wonderful!) things daily. All of that negative energy can be counterproductive to the creative process.
To go with that spirit, here is my list of non-goals:
1. Eating breakfast daily and finding ways to make it quick, healthy and interesting. It really is the most important meal of the day :)
2. Constantly looking for positive ways to channel creative energy, as well as keeping up with this blog. It has been very rewarding to do something just for me.
3. Continually working on my marriage - everyday is better than the last, proof that the best is yet to be.
4. Sweeping and keeping up with the house, it is the little things that make a house feel like a home.
5. Remembering to count my blessing, no matter how tough a situation is there is still so much wonderful in my life.
6. Trying new things on a regular basis, there are so many incredible things in this world to experience.
I would encourage you to look through both of these blogs and think of the non-goals in your life. I would love it if you left some of your own non-goals in the comment section. Don't forget to make it your own!
Kate
Today I was on Pinterest and was very intrigued with this post from Take 2, They're Small about being organized. Being organized is always on my list of things to work on, so I am constantly on the look out for new good tips.
Since I started perusing the blog looking for tips on ways to improve an area of my life, I was pleasantly surprised when I came across a link to this post by Design for Mankind about non-goals for 2012.
I love this idea! I think that it becomes too easy to focus on areas where we need to improve and forget that we as individuals do good (or wonderful!) things daily. All of that negative energy can be counterproductive to the creative process.
To go with that spirit, here is my list of non-goals:
1. Eating breakfast daily and finding ways to make it quick, healthy and interesting. It really is the most important meal of the day :)
2. Constantly looking for positive ways to channel creative energy, as well as keeping up with this blog. It has been very rewarding to do something just for me.
3. Continually working on my marriage - everyday is better than the last, proof that the best is yet to be.
4. Sweeping and keeping up with the house, it is the little things that make a house feel like a home.
5. Remembering to count my blessing, no matter how tough a situation is there is still so much wonderful in my life.
6. Trying new things on a regular basis, there are so many incredible things in this world to experience.
I would encourage you to look through both of these blogs and think of the non-goals in your life. I would love it if you left some of your own non-goals in the comment section. Don't forget to make it your own!
Kate
Sunday, March 25, 2012
Chair Reupolstering
Hello,
Over the past 3 months, life has been rich and very full. Unfortunately, that has left my blog a little neglected. I have been busy with various projects that I will share with you soon.
My first post back, is about a project that has been on my "to do list" for a very long time. My aunt was kind enough to give us some dining room chairs that she had purchased a a garage sale and had not worked out at her table. Since our previous chairs had started breaking underneath our guests, the gift was amazing and perfectly timed. However, the seat upholstery was a little dated. Here is a before picture.
I kept all of the staples in the middle of the chair seat and wrapped them up in the old chair covering to throw away.
You never know what treasure you might find underneath. This beauty had spent some time in the sun.
Remember, if you cut too much fabric you can trim it down, but you cannot add more if it is too small.
Once you have your fabric cut, place the chair seats foam side down on the fabric. Make sure the the side of the fabric that you want to see is facing outward, away from the fabric so it will show.
Next, we are going to begin wrapping the seat in the fabric. My seat is a trapezoidal shape, so I started on the sides that were parallel to each other.
After you have folded the fabric over, staple it into place.
Fold the opposite side over, being sure to pull it tight, and staple into place.
The next step is the trickiest part. Fold the fabric at the corner so that the fabric is tight against the chair seat. This is a point where you might need to trim some extra fabric so that the corners do not get too bulky.
Staple the corner fold into place.
Repeat on the other corner on the same side. Then fold the rest of the fabric on that side over and staple.
Repeat the corner steps on the opposite side, again, making sure that the fabric is taut.
If necessary, screw the finished chair seat back into place.
Over the past 3 months, life has been rich and very full. Unfortunately, that has left my blog a little neglected. I have been busy with various projects that I will share with you soon.
My first post back, is about a project that has been on my "to do list" for a very long time. My aunt was kind enough to give us some dining room chairs that she had purchased a a garage sale and had not worked out at her table. Since our previous chairs had started breaking underneath our guests, the gift was amazing and perfectly timed. However, the seat upholstery was a little dated. Here is a before picture.
So, if you have chairs with a flip seat like this or find a deal at a garage sale, updating the seat is a very easy way to give a chair new life. It is a snap!
Here is what you will need:
- Chairs with removable seat (I had 6)
- Fabric (I used 2 yards)
- Staple Gun with staples
- Scissors
- Flat Head Screwdriver
The first step is to pick out the fabric that you would like to use to cover the seats with. I have upholstered host chairs, also a garage sale find, that I like. So, I needed to pick a fabric that went well with them.
After a fun day of shopping with some friends, we ended up at Lewis and Sheron. A great place to shop for fabric in Atlanta. They also have a website. I chose a neutral fabric to go with the host chairs and to not compete with the other colors in the room.
Once you have the fabric, the next step is to take the seat off the chair. Mine happened to have screws underneath, but not all chairs will.
If you have screws, be sure to put them somewhere that they will not get lost.
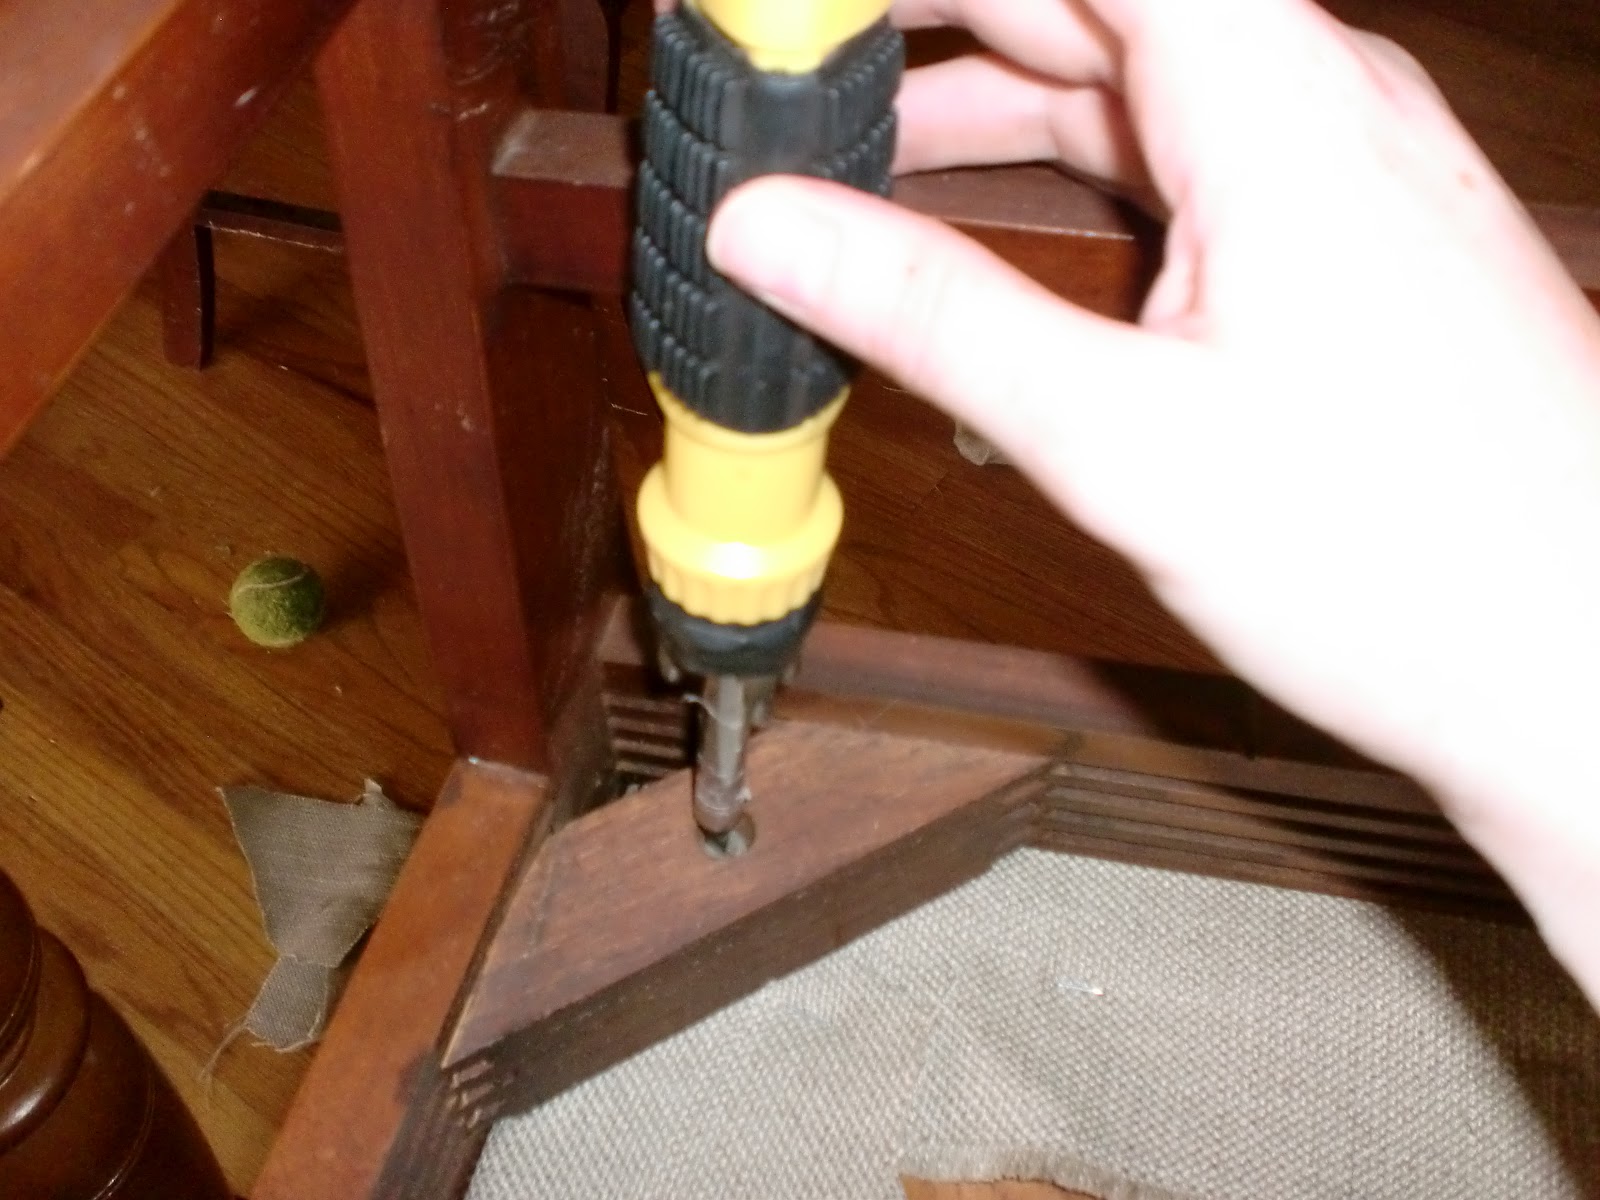
After the seat is off the chair, it is time to remove the existing fabric. I used a flat head screwdriver to go underneath the staples and pop them off.
I kept all of the staples in the middle of the chair seat and wrapped them up in the old chair covering to throw away.
You never know what treasure you might find underneath. This beauty had spent some time in the sun.
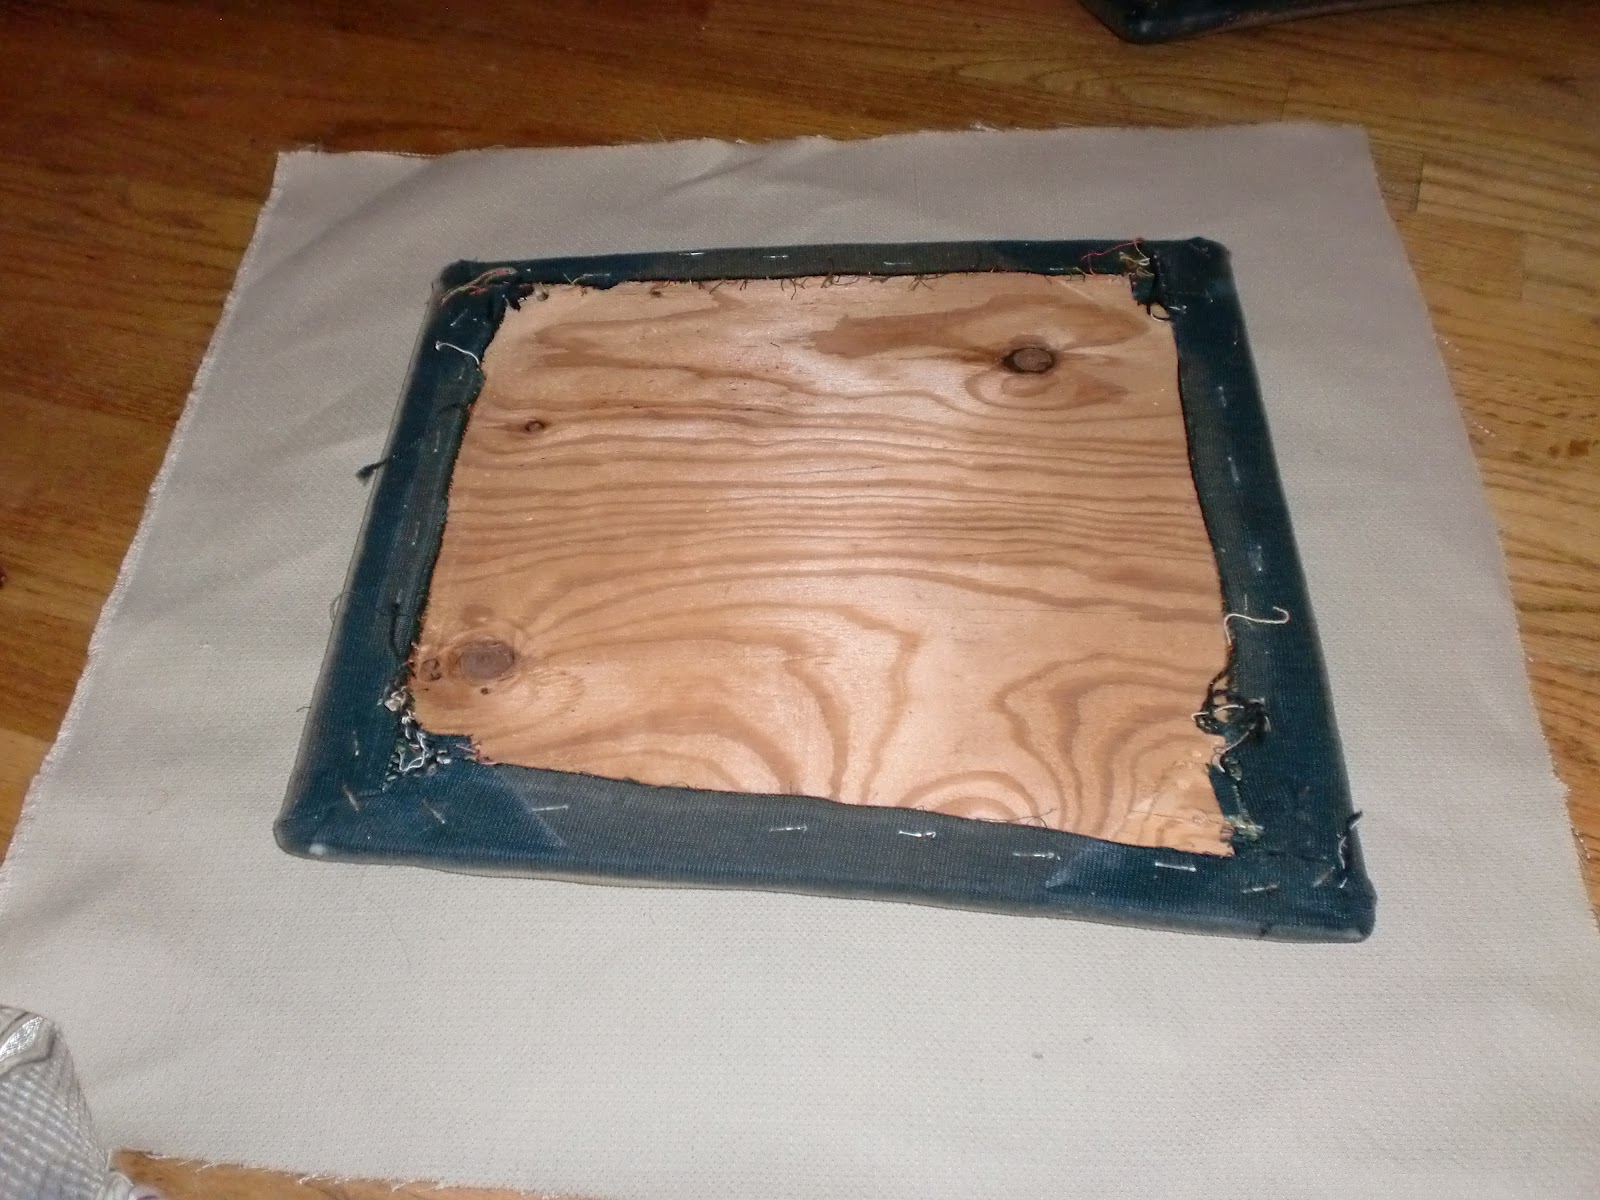
I chose to leave the original covering on to keep the foam in place. The fabric I bought will go on top. First you want to measure out enough fabric to cover the seat and wrap around the sides about 2-3 inches.
Remember, if you cut too much fabric you can trim it down, but you cannot add more if it is too small.
Once you have your fabric cut, place the chair seats foam side down on the fabric. Make sure the the side of the fabric that you want to see is facing outward, away from the fabric so it will show.
Next, we are going to begin wrapping the seat in the fabric. My seat is a trapezoidal shape, so I started on the sides that were parallel to each other.
After you have folded the fabric over, staple it into place.
Fold the opposite side over, being sure to pull it tight, and staple into place.
The next step is the trickiest part. Fold the fabric at the corner so that the fabric is tight against the chair seat. This is a point where you might need to trim some extra fabric so that the corners do not get too bulky.
Staple the corner fold into place.
Repeat on the other corner on the same side. Then fold the rest of the fabric on that side over and staple.
Repeat the corner steps on the opposite side, again, making sure that the fabric is taut.
If necessary, screw the finished chair seat back into place.
Here is the finished product.
Repeat the process on all of your chairs.
I hope you enjoy this quick, easy way to update chairs! Remember to make it your own.
~Kate
Wednesday, December 7, 2011
Ruffle Tree Skirt
Hi,
A few months ago, a friend of mine asked me if I had seen the "no sew ruffle tree skirt" on Pinterest. She thought that it would be a good project for my blog. I had not, but immediately looked it up. I loved it! Plus, my existing tree skirt was in desperate need of a make over. When I found some beautiful unbleached fabric at Hobby Lobby, I knew that it was a project match made in heaven.
Normally, I get inspiration from other people and do something to make it my own. However, I pretty much copied this blog. I would definitely recommend checking it out. She gives great directions, but I have included my own below.
You will need
I decided to make my strips 4 1/4" wide. I thought that this would make for less work because the strips were wider. I am not sure that is how it worked out.
First, I made dots with my Sharpie 4 1/4" from the edge of the fabric about every 20". You can see my dot in the photo above. I then place my yardstick so that it connected the dots and created a guideline using yellow highlighter. The highlighter line was only noticeable if you really looked for it.
A few months ago, a friend of mine asked me if I had seen the "no sew ruffle tree skirt" on Pinterest. She thought that it would be a good project for my blog. I had not, but immediately looked it up. I loved it! Plus, my existing tree skirt was in desperate need of a make over. When I found some beautiful unbleached fabric at Hobby Lobby, I knew that it was a project match made in heaven.
Normally, I get inspiration from other people and do something to make it my own. However, I pretty much copied this blog. I would definitely recommend checking it out. She gives great directions, but I have included my own below.
You will need
- 6 yards of fabric
- Glue gun and glue
- Old or cheap tree skirt
- Scissors
- Yard stick
- Sharpie or other pen
*Note 1: The original blog recommends 4 yards of fabric. I cut my strips wider than she did and ended up needing more fabric. Or maybe my ruffles were too tight. Who knows. I used a little less than 6 yards.
*Note 2: The original blog recommends using a rotary cutter. If you have one, use it. I do not have one and it was quite the undertaking to try and cut all of these long strips in a straight line.
Here is what my original tree skirt looked like. I bought it at Target for $3.00 five years ago. It was definitely time for an upgrade.
Say hello to my eager little helper.
First things first, I cut my original 4 yards in half to make the length a little bit more manageable. Notice my helpful little helper :)
Next, I cut along the highlighter line to create a long strip. Repeat process until you have cut all of the fabric into strips. It would be some much easier to use a rotary cutter :)
You should have a big pile of strips like this.
Next step is to basically fold the strips to create ruffles and then glue them concentric circles. I found that it was easiest to fold 4-6 ruffles where they would go on the tree skirt and then glue underneath like so.
I started at the very edge and was able to make the skirt bigger that it was before.
When one strip ended, I glued the strips together and continued on with the ruffle pattern.
Once I got to the end of the tree skirt, I felt that it looked a little unfinished.
I decided to put a band around the top. I cut a skinny strip, about an inch - inch and half.
I glued the band around the top of tree skirt, making pleats as necessary, but not ruffling like the rest of the skirt.
Here is the finished product.
I was really pleased with how it turned out and hope that you will be too. Make it your own.
~Kate
Saturday, December 3, 2011
Adult Advent Calendar
Hi,
Growing up, one of my favorite parts of Christmas was the advent calendar. My family had several that ranged from the grocery store chocolate to adding an ornament to a small tree. The advent calendar helped build the anticipation and magic of the season and I loved it.
However, as an adult, that grocery store chocolate just doesn't taste as good as I remembered and space is limited in our house for a bigger calendar. Plus, Rob was not very interested in participating and it was just not as fun by myself.
So, when I saw an idea for an adult advent calendar on Pinterest using lotto tickets, I knew that I needed one for my house. It's only been two days, but my husband and I both look forward to the moment when we get to pull a ticket from the calendar. Plus, we have already won $7 :)
Here is what you will need:
*Note: I used burlap because I had it. If I were to do this again, I would use something else that would be a little neater.
First, lay out the lottery tickets in a formation that you like.
I ended up using 5 of the magnet squares, but I got it to stay on the side of our refrigerator. Here is the end product.
I hope that you enjoy this project and the advent season. Make it your own.
~Kate
Growing up, one of my favorite parts of Christmas was the advent calendar. My family had several that ranged from the grocery store chocolate to adding an ornament to a small tree. The advent calendar helped build the anticipation and magic of the season and I loved it.
However, as an adult, that grocery store chocolate just doesn't taste as good as I remembered and space is limited in our house for a bigger calendar. Plus, Rob was not very interested in participating and it was just not as fun by myself.
So, when I saw an idea for an adult advent calendar on Pinterest using lotto tickets, I knew that I needed one for my house. It's only been two days, but my husband and I both look forward to the moment when we get to pull a ticket from the calendar. Plus, we have already won $7 :)
Here is what you will need:
- 24 $1 scratch off lottery tickets - I did 12 Lucky 7's and 12 Jingle Bucks
- 2 $2 scratch off tickets for Christmas day - Jumbo Jingle Bucks
- Foam Core
- Glue Gun
- Paper or cloth for the pockets - I used burlap
- Paper for the numbers on the pockets (optional)
- Sharpie
*Note: I used burlap because I had it. If I were to do this again, I would use something else that would be a little neater.
First, lay out the lottery tickets in a formation that you like.
Next, use the cloth or paper to measure an appropriate pocket size.
Cut the material into 24 pockets. For me, the Jumbo Jungle Bucks for Christmas day were bigger than the other tickets, so it needed a bigger pocket.
After I had cut all of the squares for the pockets, I cut some squares of paper. I glued the paper squares onto the burlap pockets.
The next step is to write the numbers 1-24 on the smaller pockets and write 25 on the bigger pocket.
Once I had written all of the numbers, I used a hot glue gun to secure the sides and bottom of the burlap to create the pockets.
Don't worry, I did not actually hot glue on my table.
After all of the pockets were glued to the board, it was time to put the lottery tickets in.
Here's what it looked like once all of the tickets were in place.
The next thing that I had to figure out was where I was going to keep our advent calendar. I found these magnets that I had gotten for another project.
I put them on the back of the foam core like so.
I hope that you enjoy this project and the advent season. Make it your own.
~Kate
Subscribe to:
Posts (Atom)