I am getting so excited for Halloween! As a result, I have begun decorating my house to make it feel festive. This BOO sign that I found on Pinterest was the perfect place to start. Plus, it came with an added bonus - 2 super cute signs for door knobs.
What you will need.
- Foam Core
- Letters spelling BOO
- Scissors
- Xacto Knife
- Scrapbook Paper
- Glue Stick
- Ribbon
- Stapler (optional)
- Felt (optional)
- Emery board (not pictured)
*Note: I used white foam core, but would recommend black. I feel like it cuts more smoothly and looks nicer. Also, I pictured a glue gun, but used a glue stick instead.
This sign was adapted from one that used wooden letters from a craft store. However, I did not like the letters that my local craft store had. Instead, I printed out the BOO in the font Georgia, bolded, size 700. You can use any font that you like. After I printed the letters out, I began to cut them out.
The end result looked something like this.
The next step is to pick the scrapbook paper that you would like to use. I bought a scrapbook paper book, on sale, from my local Micheal's. I decided to use paper with a black background so that it would standout against my red door. These are the three that I chose.
The next step is to trace the letters that you cut out on to the scrapbook paper. I used a Sharpie because I wanted it to bleed thru - in hindsight I would use a pencil.
After tracing, I cut the scrapbook paper down to smaller squares that were just outside the trace lines.Then I used my glue stick to glue the squares of paper to the foam core. Make sure that the side that you want to show is facing up.
After the squares are glued down, cut the foam core into smaller, more manageable squares.
Next, use your Xacto knife to cut along the edges of your tracing. When you are cutting the O's, be sure to leave the middles in good shape. We will use these for our bonus project.
Next, use little scissors or an emery board to smooth out the edges.
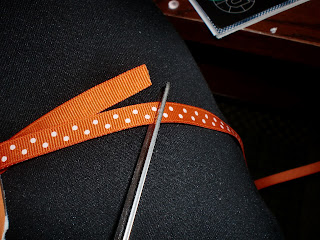
Once the edges are smooth, connect the letters using the ribbon. I used 1/4" polka dotted orange grosgrain. Measure and cut the ribbon to the desired length.
You can tie bows to hold the letters together, but I elected to use a staple to hold the letters together.
I did a loop knot at the top of the B.
Here is what the end result looked like.
I will do a separate post for the bonus project, but if you need a sneak peek here it is.
I hope that you enjoy this project. Remember, make it your own :)
~Kate


No comments:
Post a Comment